
WordPress is a content management system (CMS) that is widely used for creating websites and blogs. It was first released in 2003 and has since become the most popular CMS in the world, powering over 60 million websites.
One of the main reasons WordPress is so popular is its ease of use. It has a user-friendly interface that allows users to easily add and manage content, such as text, images, and videos. WordPress also has a large community of developers who have created a wide range of plugins and themes, which can be used to add functionality and customize the design of a WordPress site.
In addition to its user-friendly features, WordPress is also highly customizable. It can be used to create any type of website, from simple blogs to complex e-commerce sites. Its flexibility and scalability make it a popular choice for businesses of all sizes.
WordPress is a powerful and versatile CMS that is well-suited for creating and managing a wide range of websites and blogs. Its ease of use and extensive customization options make it a popular choice for both beginners and experienced web developers.
Starting a WordPress blog is easy and can be done in a few simple steps.
First, you will need to choose a hosting provider for your WordPress blog. A hosting provider is a company that stores your blog’s files on its servers, making them accessible to visitors. There are many hosting providers to choose from, such as Bluehost, HostGator, and SiteGround.
Next, you will need to purchase a domain name for your blog. A domain name is the address people will use to access your blog (e.g., example.com). You can purchase a domain name from a domain registrar like GoDaddy or Namecheap.
Once you have chosen a hosting provider and purchased a domain name, you will need to install WordPress on your hosting account. Most hosting providers offer a one-click installation of WordPress, making it easy to get started.
Once WordPress is installed, you can start customizing your blog. You can choose a theme, add plugins, and write your first blog post. Finally, you will want to promote your blog to attract visitors. You can do this through social media, guest posting on other blogs, and by optimizing your blog for search engines.
Table of Contents:
- Choose a hosting provider
- Purchase a domain name
- Install WordPress
- Customize your blog
- Time to write a blog post
- Optimize wordpress for SEO
- Promote your blog

Step 1: Choose a Hosting Provider
When choosing a hosting provider for your WordPress site, there are a few important factors to consider:
First is the price. The price of hosting can vary widely, so it’s important to find a provider that offers a good value for your money.
Another important factor is performance. Look for a hosting provider that offers fast load times and reliable uptime. This is especially important if you are running an e-commerce site or a site that relies on user engagement.
Different hosting providers offer different features, such as the ability to host multiple websites, email hosting, and automatic backups. Consider which features are important to you and choose a provider that offers them.
It’s also important to choose a hosting provider that offers good customer support, in case you run into any issues with your hosting account.
Look for a hosting provider that has a good reputation in the industry and positive reviews from its customers.
Some popular hosting providers for WordPress include Bluehost, HostGator, and SiteGround. It’s a good idea to do some research and compare the different options before making a decision.
Bluehost is a popular choice for hosting WordPress websites because it offers a number of features that are well-suited for WordPress.
Bluehost offers a range of hosting plans at affordable prices, making it a good choice for those on a budget.
When you sign up for a hosting plan with Bluehost, you’ll get a free domain name for the first year.
Bluehost makes it easy to get started with WordPress by offering a one-click installation process.
Bluehost’s servers are optimized for WordPress, which can result in faster load times and better performance for your site.
Bluehost has a reputation for offering good customer support, with 24/7 phone, chat, and email support available to help with any issues you may have.
To sum it up, Bluehost is a reliable and affordable choice for hosting a WordPress website.
Step 2: Purchase a Domain Name
Choosing the right domain name is an important step in creating a website.
You should keep it short and memorable. A short and memorable domain name is easier to type and remember, which can help drive traffic to your site.
By including keywords in your domain name can help with search engine optimization (SEO) and make it easier for people to understand what your site is about.
Using numbers and hyphens in your domain name can make it harder to remember and type, and may not be as professional. So avoid them.
There are various top-level domains (TLDs) available, such as .com, .net, and .org. Choose a TLD that is appropriate for your business and target audience.
Before you decide on a domain name, be sure to check if it is available to register. You can do this by using a domain name registrar, such as GoDaddy or Namecheap.
Keep in mind that the domain name you choose will become a part of your brand, so take the time when choosing one.
After you decide on your domain name, you’ll need to follow these steps to purchase one.
Choose the right domain registrar. Some popular domain registrars include GoDaddy and Namecheap.
Use the domain registrar’s website to search for the domain name you want to purchase. If the domain name is available, you can proceed to the next step. If the domain name is not available, you may need to choose a different domain name or consider purchasing the domain name from the current owner.
Choose the domain name extension you want, such as .com, .net, or .org.
Some domain registrars offer additional services, such as privacy protection and website hosting, that you can add to your purchase.
Follow the registrar’s checkout process to complete the purchase of your domain name. This will typically involve providing your personal and payment information.
Once the purchase is complete, you will be the owner of the domain name and can use it for your website or email. Keep in mind that you will need to renew your domain name every year to keep it active.
Step 3: Installing WordPress
There are a few different ways to install WordPress, depending on your hosting provider:
Many hosting providers offer a one-click installation process for WordPress, which makes it easy to get started. Simply log in to your hosting account and look for the WordPress installation option.
If your hosting provider does not offer an automatic installation option, you can install WordPress manually. To do this, you’ll need to download the WordPress installation files from wordpress.org, upload them to your hosting account, and then create a MySQL database for WordPress.
Some hosting providers offer a CMS installer, such as Softaculous, which can be used to install WordPress with a few clicks.
If you have any issues with the installation process, you can usually find help in the WordPress documentation or by contacting your hosting provider’s customer support.
To install WordPress manually, you’ll need to follow these steps:
Download the WordPress installation files from wordpress.org and unzip them on your computer.
Create a MySQL database and user for WordPress. If you’re using a hosting provider, you may be able to create a database using the hosting provider’s control panel.
Edit the wp-config.php file and add your database information. This file is located in the root WordPress directory.
Upload the WordPress files to your hosting account. You can use a FTP client, such as FileZilla, to do this.
Run the WordPress installation script by accessing the URL of your website in a web browser. This will typically be something like http://yourdomain.com/wp-admin/install.php.
Follow the prompts to complete the installation process. You’ll need to provide your website’s title, create an administrator account, and select a theme.
Once the installation is complete, you can log in to your WordPress site and start customizing it. If you run into any issues with the installation process, you can find help in the WordPress documentation or by contacting your hosting provider’s customer support.
After installing WordPress, there are a few settings that you might want to configure to get your site up and running. Here are some options to consider:
General settings: Go to the “Settings” menu and click on the “General” submenu to configure your site’s title and tagline, as well as your email address and timezone.
Permalinks: Go to the “Settings” menu and click on the “Permalinks” submenu to choose the URL structure for your posts and pages.
User profiles: Go to the “Users” menu and click on the “Your Profile” submenu to configure your personal user profile, including your name and contact information.
Discussion settings: Go to the “Settings” menu and click on the “Discussion” submenu to configure how comments and pingbacks are handled on your site.
Media settings: Go to the “Settings” menu and click on the “Media” submenu to configure the default settings for images and other media files.
Install and activate any plugins that you want to use on your site.
Choose a theme for your site and customize it to your liking.
These are the basics of the settings you might want to consider after installing WordPress. You can find more options by exploring the various menus and submenus in the WordPress dashboard.
Step 4: Customize Your Blog
Choosing a WordPress theme can be a challenging task, as there are thousands of options available. Here are a few tips to help you choose the best theme for your WordPress site:
Before you start looking for a theme, it’s important to decide on the purpose of your site. This will help you narrow down your options and choose a theme that is well-suited to your needs.
Look for a theme that has a design that fits with your brand and the overall look and feel you want for your site.
Make sure the theme you choose is compatible with the version of WordPress you are using and any plugins you are planning to use.
A responsive theme is one that is designed to work well on a variety of devices, including desktop computers, tablets, and smartphones. This is important because more and more people are accessing the web on mobile devices.
Check out reviews and ratings from other users to get an idea of how well a theme performs and if there are any known issues.
Many WordPress themes offer a live demo or a free trial, which can allow you to test out the theme before making a purchase.
Keep in mind that you can always switch to a different theme if you’re not satisfied with your initial choice.
To change the design template (also known as the theme) of your WordPress blog, follow these steps:
- Log in to your WordPress dashboard.
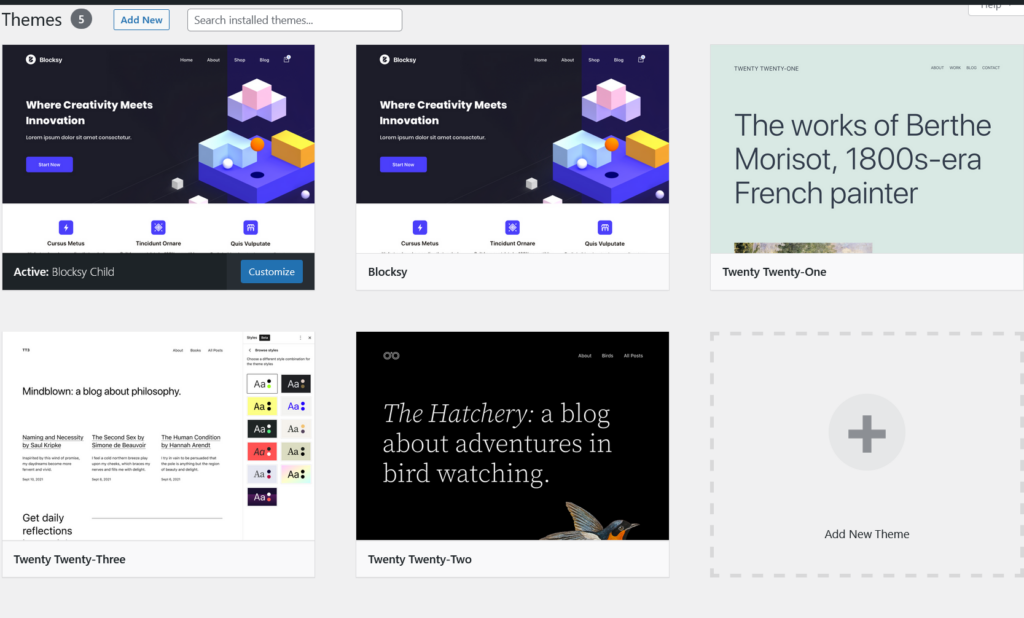
- In the left-hand sidebar, click on the “Appearance” menu and then click on the “Themes” submenu.
- To install a new theme, click on the “Add New” button at the top of the page. This will take you to the WordPress theme library, where you can browse and search for themes.
- When you find a theme you like, hover your mouse over the theme and click on the “Install” button.
- Once the theme is installed, click on the “Activate” button to make it the active theme for your site.
- If you want to customize the theme, click on the “Customize” button. This will open the WordPress theme customizer, which allows you to change various aspects of the theme’s design, such as the colors, fonts, and layout.
- When you’re finished customizing the theme, click on the “Publish” button to save your changes.
That’s it! You’ve successfully changed the design template for your WordPress blog.
There are also thousands of WordPress plugins available, and the “must-have” plugins will vary depending on the specific needs of your site. Here are ten popular WordPress plugins that many websites find useful:
Yoast SEO: This plugin helps with search engine optimization (SEO) by allowing you to easily add titles, descriptions, and keywords to your website’s pages and posts.
WPForms: WPForms is a plugin for creating forms, such as contact forms and surveys.
Akismet: This plugin helps protect your site from spam comments.
W3 Total Cache: W3 Total Cache is a plugin that helps improve the performance of your website by caching pages and posts.
Cloudflare: Cloudflare is a plugin that integrates with the Cloudflare CDN and security platform, helping to improve the performance and security of your website.
UpdraftPlus: UpdraftPlus is a plugin for creating backups of your WordPress site.
WP Smush: WP Smush is a plugin that helps optimize images on your site, reducing the file size and improving load times.
To install a WordPress plugin, follow these steps:
- Log in to your WordPress dashboard.
- In the left-hand sidebar, click on the “Plugins” menu and then click on the “Add New” button.
- You can search for a specific plugin by typing its name into the search field or browse through the available plugins by clicking on the appropriate links.
- When you find a plugin you want to install, click on the “Install Now” button.
- Once the plugin is installed, click on the “Activate” button to turn it on.
- Some plugins will require additional configuration. If this is the case, you’ll see a notification after activating the plugin with instructions on how to set it up. Follow these instructions to complete the plugin setup.
You can manage your installed plugins by going to the “Plugins” menu and clicking on the “Installed Plugins” link. From here, you can activate, deactivate, or delete your plugins.
To set up Google Analytics tracking in WordPress, go to the Google Analytics website and sign up for a new account. You’ll need to provide some basic information about your website, including its name and URL.
Once you’ve set up your account, you’ll be given a tracking code that you’ll need to add to your WordPress site. The tracking code is a snippet of JavaScript that needs to be placed in the header of your site.
There are several WordPress plugins that can help you add your tracking code to your site, such as the Google Analytics plugin. Install one of these plugins and activate it.
Follow the plugin’s instructions to configure it and add your tracking code. This will typically involve entering your tracking code into a designated field in the plugin’s settings.
Once you’ve added your tracking code, you can test it by using the Google Analytics Debugger Chrome extension. This will help ensure that your tracking code is working properly.
You can use Google Analytics to track a variety of metrics, such as pageviews, bounce rate, and visitor demographics.
Step 5: Time to Write a Blog Post
To write a blog post in WordPress, log in to your WordPress site and click on the “Posts” menu in the left-hand sidebar.
Then click on the “Add New” button to create a new blog post.
Add a title to your blog post by typing it into the “Enter title here” field.
Write your blog post in the editor area. You can use the formatting tools to add headings, bold and italic text, lists, and more.
Add any images or other media by clicking on the “Add Media” button.
Choose a category for your blog post by clicking on the “Categories” list on the right-hand side of the screen and selecting the appropriate category.
If you want to schedule your blog post to be published at a later date, click on the “Edit” link next to “Publish immediately” and choose a future date and time.
When you’re ready to publish your blog post, click on the “Publish” button.
Your blog post should now be live on your website. You can always go back and edit it later by clicking on the “Edit” link next to the published post.
Step 6: Optimize WordPress for SEO
There are many ways to optimize a WordPress site for search engine optimization (SEO).
There are several SEO plugins available for WordPress, such as Yoast SEO and All in One SEO Pack, that can help you optimize your site’s content and metadata for search engines.
Choose a responsive theme, one that is designed to work well on a variety of devices, including desktop computers, tablets, and smartphones. Google has indicated that responsive design is a ranking factor, so it’s important to choose a theme that is responsive.
Use header tags (H1, H2, etc.) to organize your content and make it easier for search engines to understand the structure of your pages. Also, use internal linking to help search engines discover more of your site’s pages and content.
Use descriptive, keyword-rich file names for your images and include alt tags to describe the images. This will help search engines understand the content of your images and may improve your site’s visibility in image search results.
Choose a descriptive and keyword-rich permalink structure for your posts and pages. This will help search engines understand the content of your pages and may improve your site’s visibility in search results.
Share your content on social media platforms like Facebook, Twitter, and Instagram to increase the visibility of your site and drive traffic to it.
By following these tips, you can optimize your WordPress site for search engines and improve your site’s visibility in search results.
Step 7: Promote Your WordPress Blog
Here are a few ideas to promote your blog and increase traffic to your site:
Share your blog posts on social media platforms like Facebook, Twitter, and Instagram to reach a wider audience.
Comment on other blogs in your niche and engage with their readers. This can help you build relationships with other bloggers and drive traffic back to your own site.
Use SEO best practices to optimize your blog for search engines, such as using keywords in your blog titles and descriptions, to help your blog rank higher in search engine results.
If you have a email list, you can use email marketing to promote your blog to your subscribers.
Write blog posts that are interesting, informative, and shareable. This will make it more likely that people will share your content on social media and other platforms.
Consider using paid advertising methods, such as Google AdWords or Facebook Ads, to reach a larger audience.
You can incentivize readers to share your content by offering giveaways or other prizes for the most active sharers.
By using a combination of these techniques, you can effectively promote your blog and attract more visitors to your site.
Conclusion
That´s it. Now you know the basics of WordPress and you can start your blogging journey. Read also other articles from our site.